| Well,
TII gas tanks are no longer available - Sadly, I was
about 2 years late ordering one. After finding out the NLA bad news, I was
hoping that this tank was ok. The notes I had on this car showed it
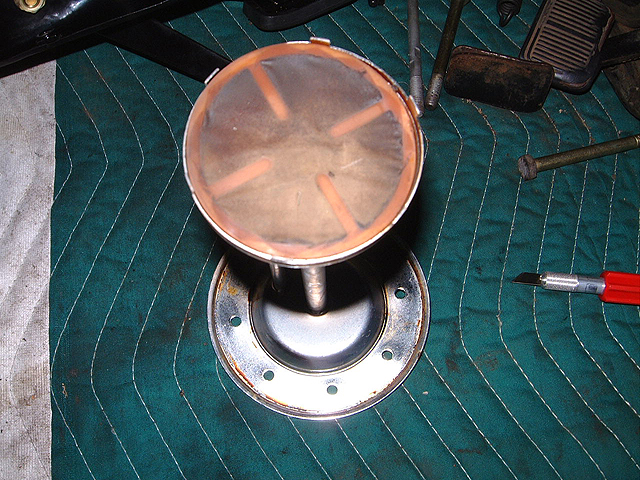
was replaced about 10 years ago with a new one. This view shows what
is unique about the TII tanks - they have two openings - one for a outbound
and inbound fuel flows, the second measures how much gas is in the tank
itself. |
 |
|
Once out of the car, you could see where the trouble was
starting to be discovered. |
 |
|
Some bad rust... why should I not be surprised? BMW's
original foam gasket design held water in this location so they all rusted,
along with the car. The tank will be taken now to a commercial metal
stripper for preparation. |
 |
|
I learned while doing the body that any area you don't want
the beads to hit you mask off with serious duct tape. I pulled the guts out
of the strainer mechanism and built a cardboard gasket. It was bolted down
using the original screws, and then masked with duct tape. More on the
tank later... |
 |
|
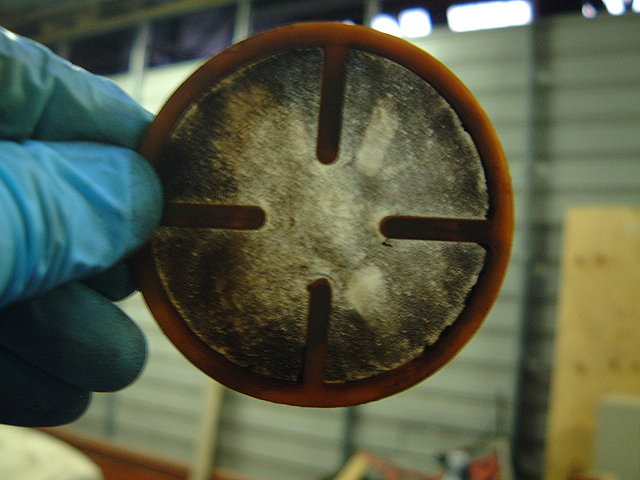
The strainer inside pulls fuel from this filter, which is on
the bottom of the tank. |
 |
|
This is NOT how one should look - it's clogged with lots of
rust particles. This is due to the car setting for about 10 years with fuel
in it - nasty stuff which clogged the fuel filter and made the car stall
out. |
 |
|
Holding it up to the light, you see how bad it is. Order
yourself a couple of these, just in case! |
 |
|
Inside the tank, the residual rust is easily seen. |
 |
|
In fact the rust is... everywhere. This will now get boiled
out by a radiator shop. |
 |
|
Most radiator shops will do this for you for a reasonable
fee. Have it sealed up if the shop can do it. |
 |
|
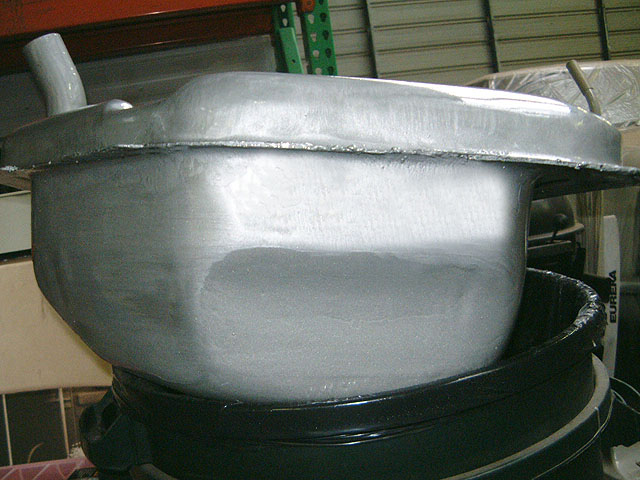
OK, here's the tank after bead blasting and then coated with
2 coats of POR-15 silver with a foam brush. You've read about this stuff,
here it is in action. To purchase POR-15, just visit their site at
www.por15.com I plan on painting this
back to black when done, this will be like the "armor plating" that will
keep the tank like new for it's next lifetime. There was no more rust on the
outside when the bead blaster had it's way with this tank. I neglected to
take a photo before I started, but you didn't miss anything really. |
 |
|
On advice from my metal stripper, I'm coating the POR-15
first to the outside before taking it to the radiator shop. The POR15 will
hold up like armor plating in the boil tank, since POR15 is strengthened by
moisture. The only thing that will be affected will be the inside of the
tank. |
 |
|
This stuff is really strong when dry - much harder than paint
or powder coating. |
 |
|
Luckily, this tank is not destroyed by rust pinholes. To make
sure it won't happen again, I'm using POR-Patch, which is similar to JBWeld
cold weld products. I have sealed up the entire outside edge with the patch
material, so it should never rust or leak again unless it is physically
damaged. The rough edges you see here have been completely sealed up, and
are not seen when installed into the trunk. |
 |
|
Next steps are boiling out, sealing the inside with POR-15
tank sealer, and then final primer and painting. It should be as good as
new. I have ordered a few of the other parts that complete this section of
the car and I'll cover off on that in coming weeks ahead. |
| --->
ON TO PART 2 --> |

