
|
|
|
|
June 2002 - The Restoration Begins Part 1: Stripping the car to bare, clean steel
|
| Despite what you've read on my web site to this point, the real restoration of Stella now began this month. Why do great things take a lot of time?? |
| For some time now, I have been in denial that I was ever going to get the point where the car was a bare steel tub. It's taken longer than I thought, more friends than I expected (thanks Tim and Steve for your afternoons and days off!!!) and more work than I thought. I've also been really busy at work this year so making time for this during January - May was really tough. So what you see here is the beginning of the big journey into what is the equivalent of remanufacturing a car. |
| Eagle Auto Stripping, Kansas City, KS. These folks were recommended to me after a journey of about 2 months to locate somebody who can really do a cleanup on my 2002 shell. If you live near my part of the world, I highly recommend these guys. They do know what they are doing, by the churn of projects I see coming in (muscle cars, Harley frames, Willys Jeeps, horse trailers, Greyhound buses) other people like them too. If you find your way there, please let Mark know I sent you. |
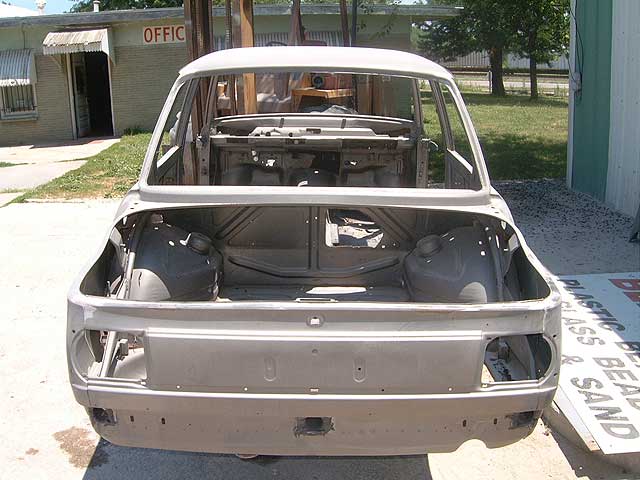 |
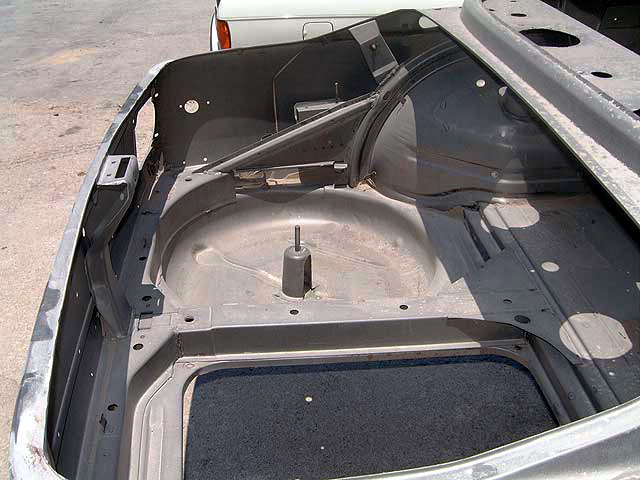
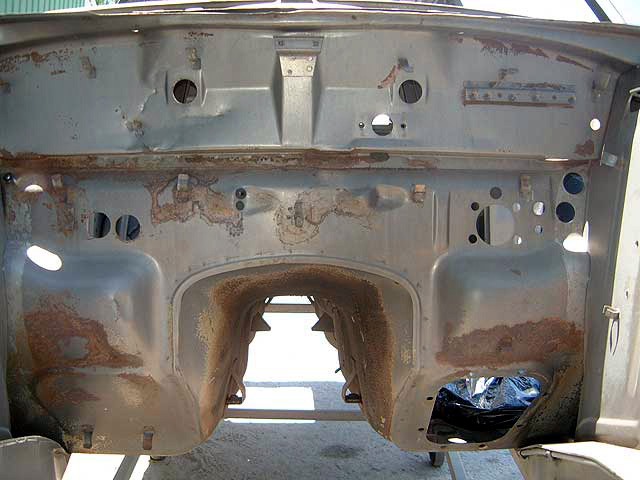
| Back of the car. The first step is media blasting, where plastic beads are shot at the car which remove paint but not bondo or rust. It allows you to see where the rust is. If you peek through the right tail light hole you can see rust where the gas tank was. This is where the foam gasket absorbs water in a 2002 and causes rust because it just acts like a sponge. It's not bad, there is a close-up photo listed below. The hole in the trunk was somebody's attempt to put a subwoofer in at some point. This will have to be fixed. But the beauty is the trunk itself however, all the crud has been removed from the shock towers and back plate, so you see the steel as it was at the factory. In fact most of the photos you see here will be close to factory assembly steel photos. Note the brazing, body solder and spot welds in the pics below. They may help you someday! |
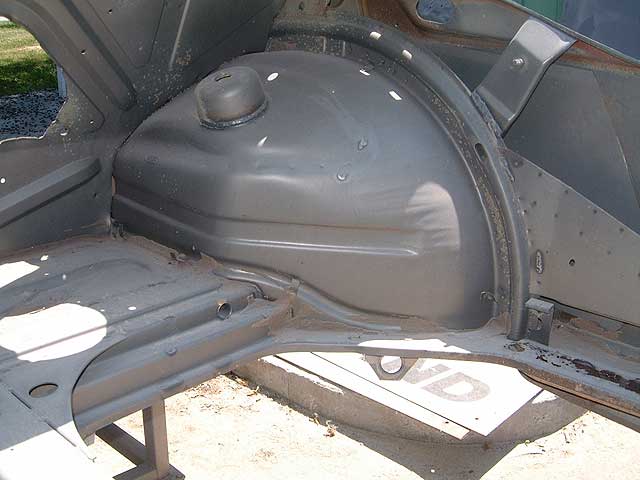 |
| Right shock tower. There is minor surface rust behind the wheel well, glass beading which is the next step will remove all this. |
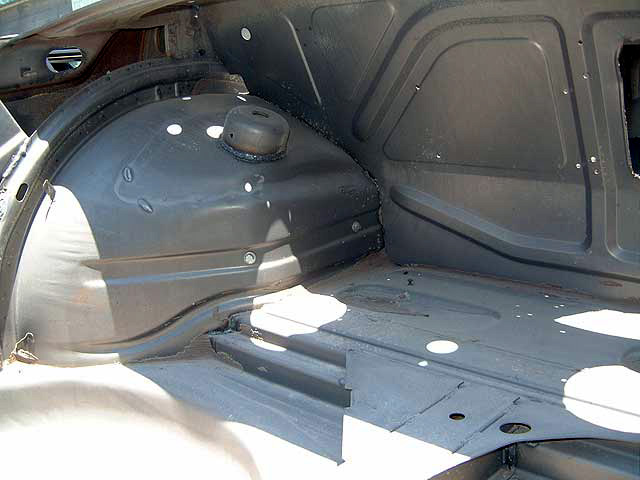 |
| Left shock tower with better shot of that surface rust. I haven't investigated the two bolts below the shock mount, but if they don't do anything, they get welded up. The dust you see is because the car hasn't been blown out yet. |
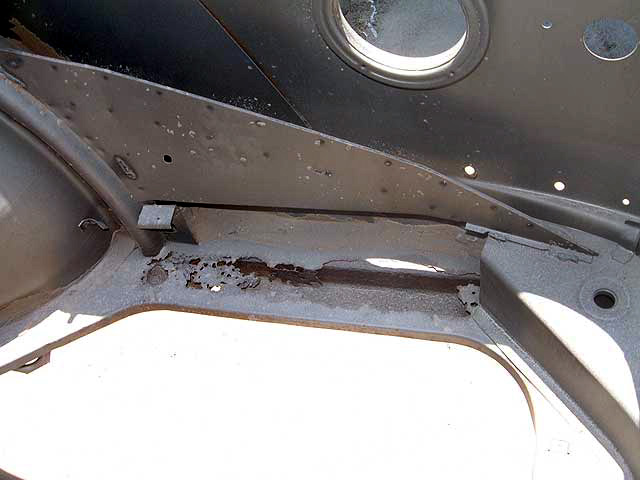 |
| The notorious rust from the gas tank bracket. This will get cut out and filled or painted with POR15 prior to priming and painting. |
 |
| This is what a trunk is supposed to look like! No holes in the spare tile well or rust. I'm lucky. |
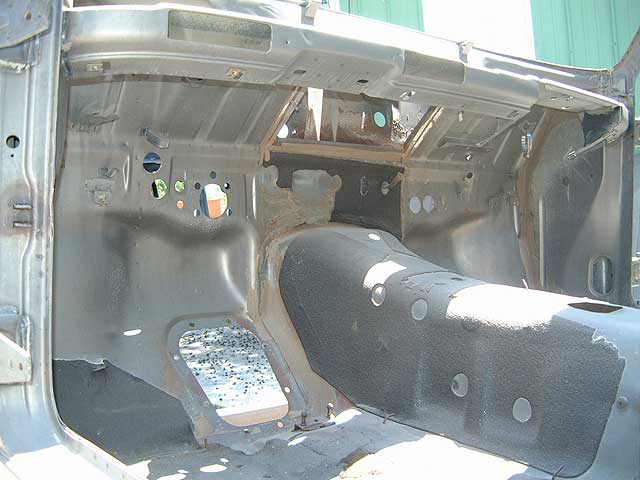 |
| Under the dash. This big hole above the tunnel is where the heater box goes. The black material is the original sound deadening materials from the factory. This is the stuff that is hell to get off. |
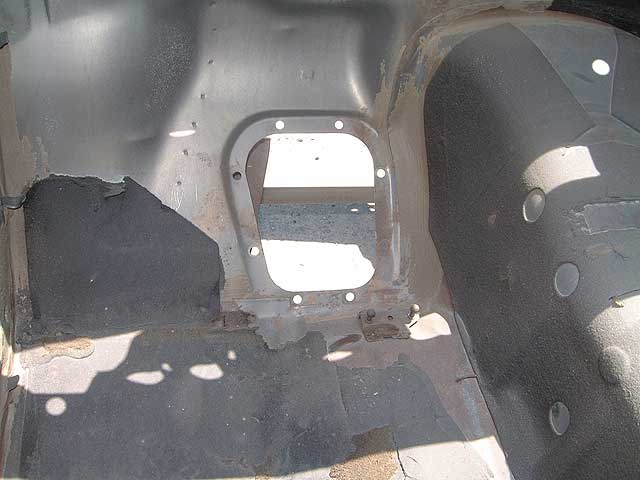 |
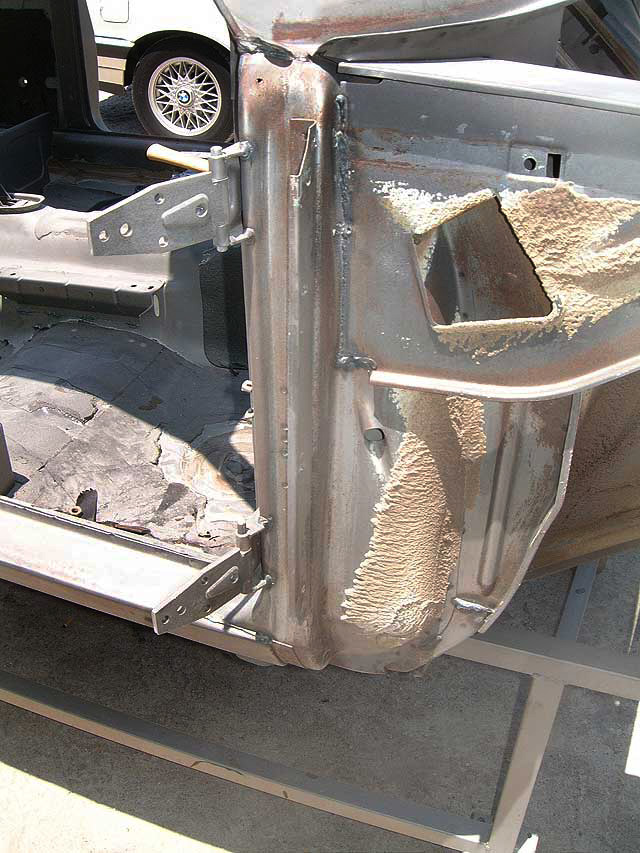
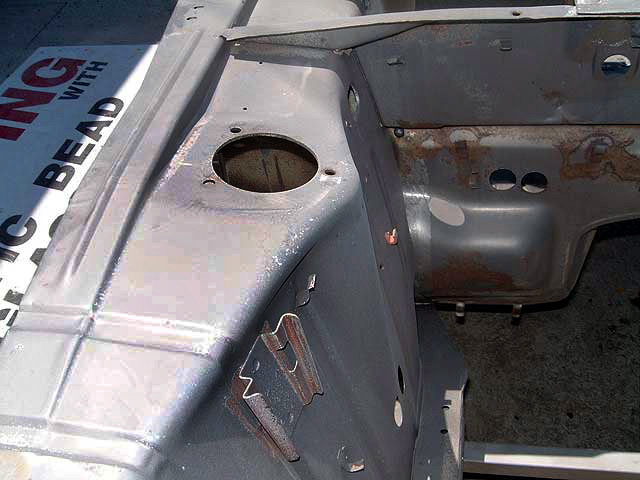
| Close up of where the pedal box goes. I have a powder coated pedal box and pedals to install here. |
 |
| The driver side seat mounts and the transmission tunnel. This area was all like brand new under the carpet with the factory primer. Where there was primer, the media blasting was able to get to the metal. |
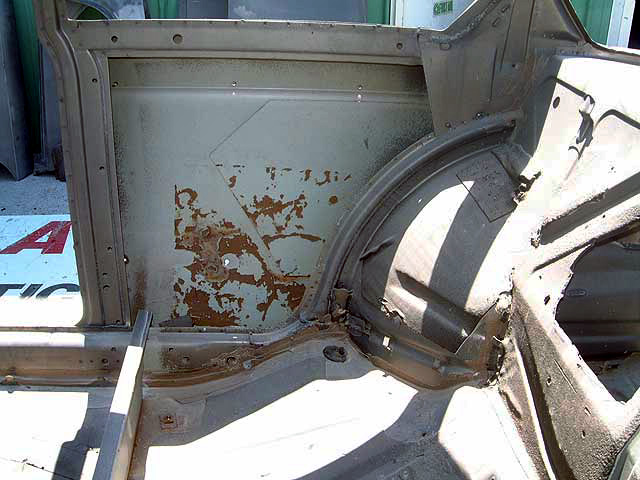 |
| Passenger side, rear quarter. The brown stuff is the goo that held some very minimal sound proofing here. And you wonder why your car is noisy sitting still? |
 |
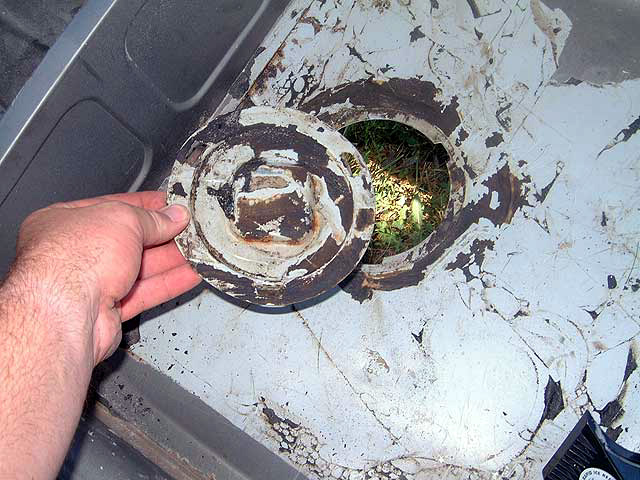
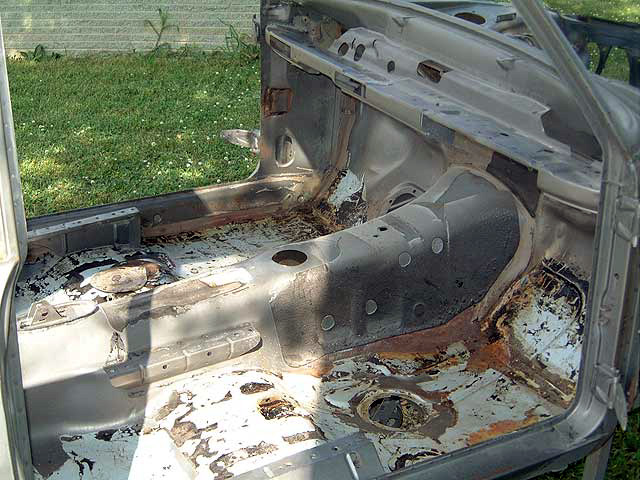
| OK now, here's one of those drain traps you hear about. There are four, they all have rust, get them all out of your car when you're here. About a 1/3 of a turn and a pop with the hammer gets them out. There is surface rust next to the transmission tunnel. This will be eliminated by removing the tar material and then glass beading it. |
 |
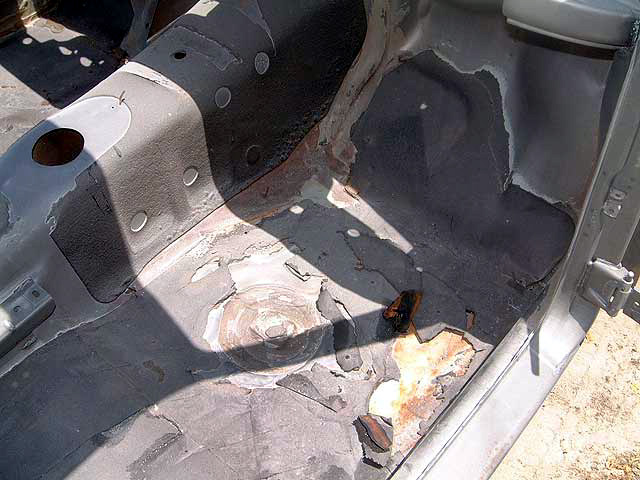
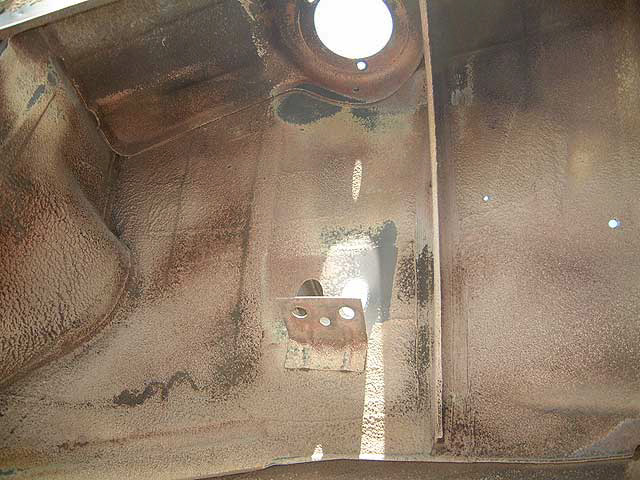
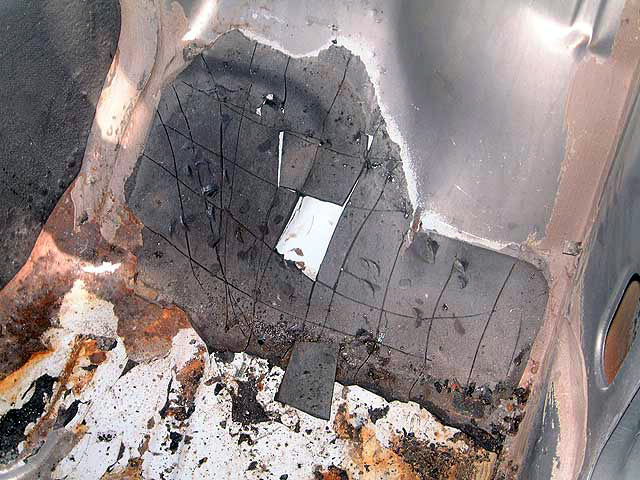
| The passenger side floor pan. Here I've scored the black soundproofing in a checkerboard pattern in order to apply the dry ice technique to remove it. More on this later. You can see the seat belt mounts on the tranny tunnel, as well as the emergency brake supports. |
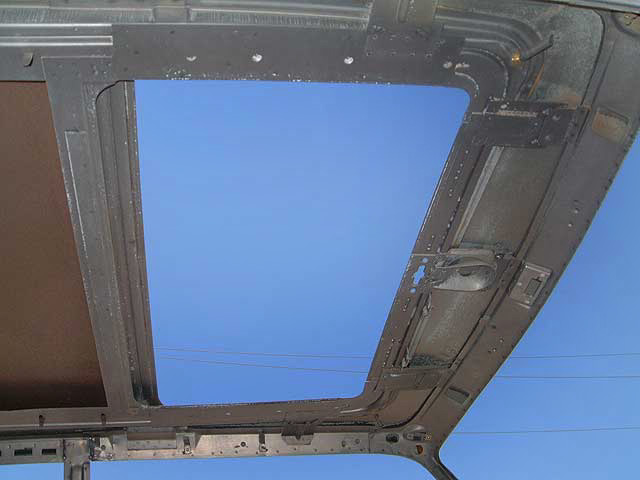 |
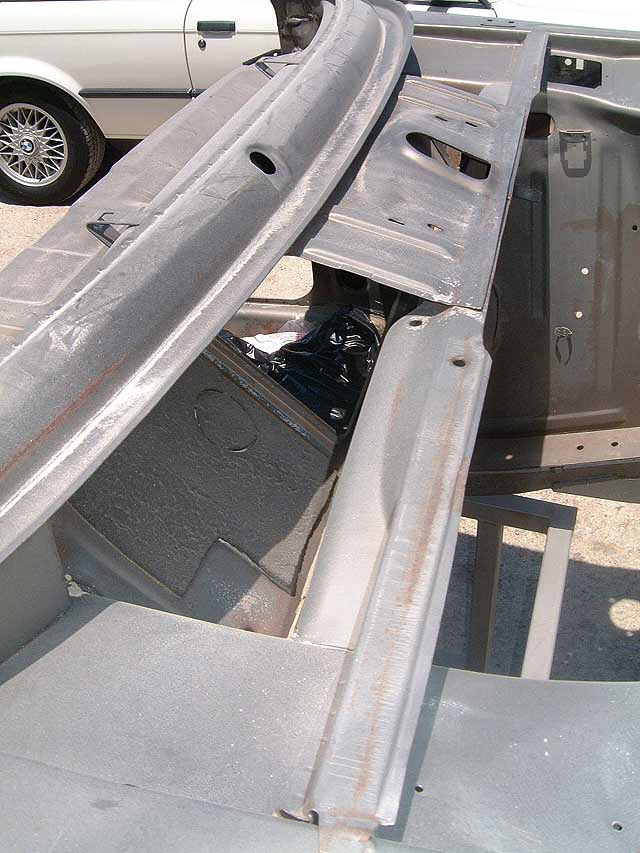
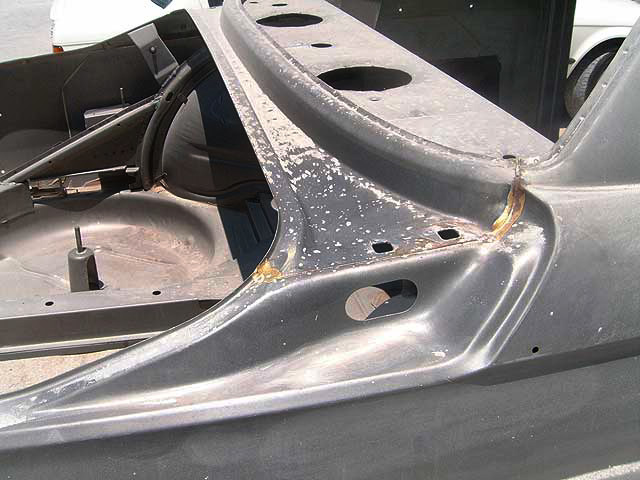
| A view of the sunroof opening, showing the mounts. In the upper right hand corner, you can see the brass brazing where the sunroof drain tubes attach. I plan to replace the OEM stuff with better lasting reinforced hoses. The old stuff looked like some kind of bad plastic tan garden hose. No wonder folks worry about poking holes into it! |
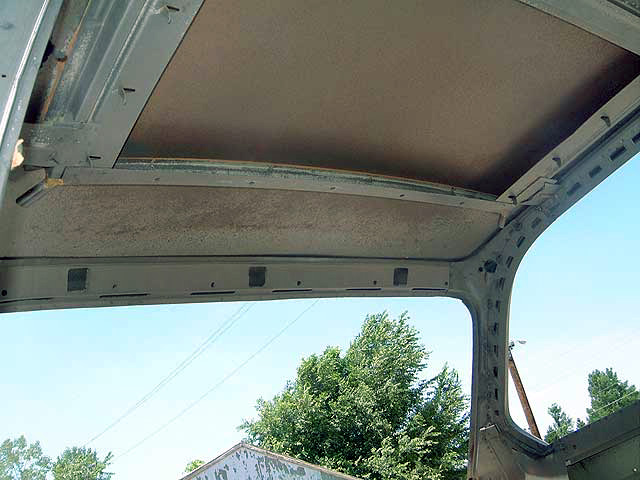 |
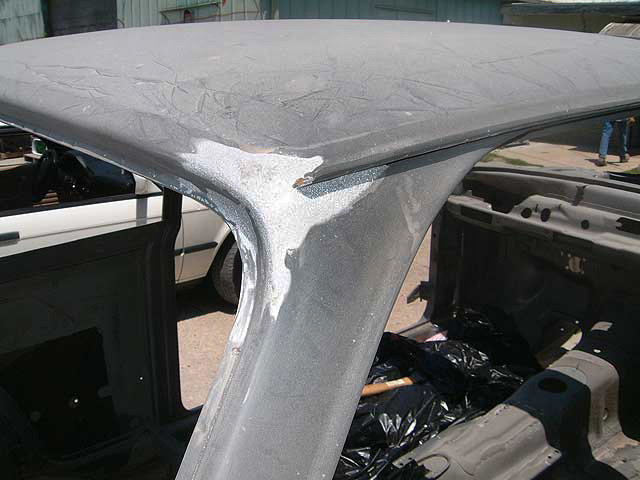
| The rear of the roof. You can clearly see the two brazed on rear drain tubes, and their hoses run through the adjacent quarter sized hole in the C pillar. |
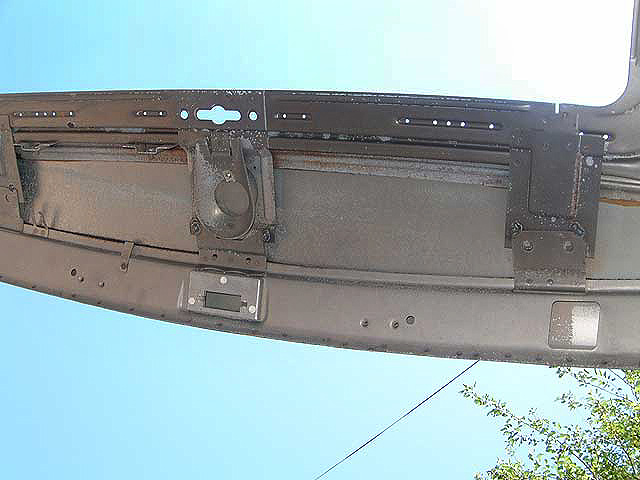 |
| A close up of where the sunroof crank goes and where the visors mount in the roof. |
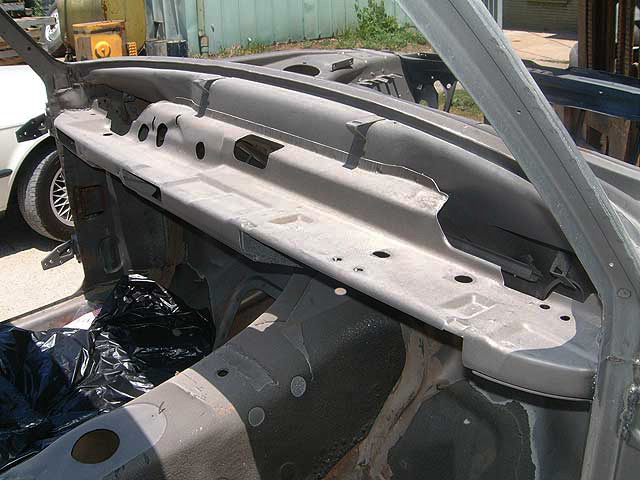 |
| If you haven't looked under your dashboard, here it is. Where the glove box mounts, they actually took black paint on a brush and sloshed it on to make it black when you open the glove box. It's really a lousy job in the cars I've seen. |
 |
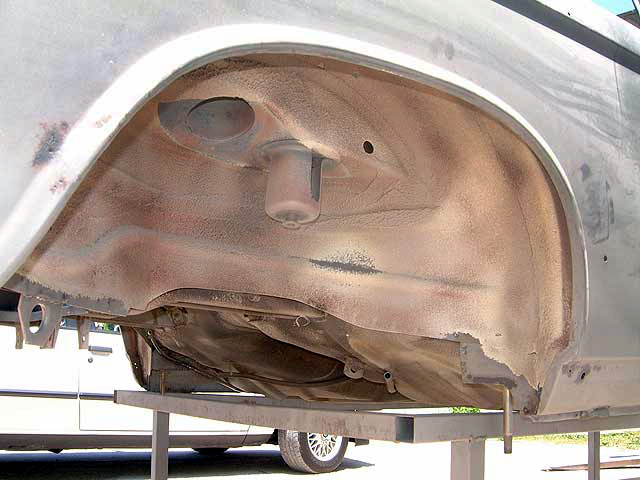
| On a sunroof car, the drain tubes come out under the fender skirt. The undercoating is some pretty tough stuff to get out. They are not done removing it all yet. |
 |
| A view up the fender where the brake lines and struts fit. |
 |
| The other view looking down into the engine compartment. Again minor surface rust |
 |
| Windshield wiper land. I can't remove the black piece here, so it's going to stay. I see this in many cars. What did they glue this on with??? |
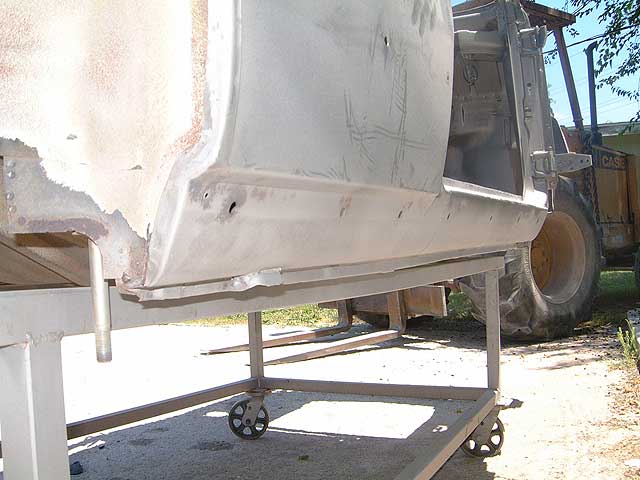 |
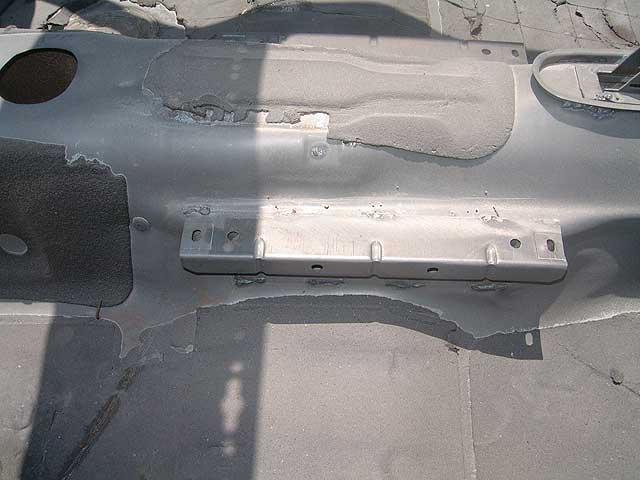
| The rockers are fine. The big bolt to the left is what holds your rear carrier mounts. |
 |
| A little rust in fender lip, more undercoating. I plan to replace the undercoating for the most part with Polyurea, commonly referred to as truck bed liner. |
 |
| Right quarter. These sanding areas were probably done at the factory to fix defects in the original steel. |
 |
| Trunk hinge mounts. |
 |
| Body solder job from the factory, I presume. Another boo-boo from Munich? |
 |
| You can see where the rust formed on the surface behind the firewall insulation and around the pedal box. The tranny tunnel shows some stubborn undercoating not coming off yet. |
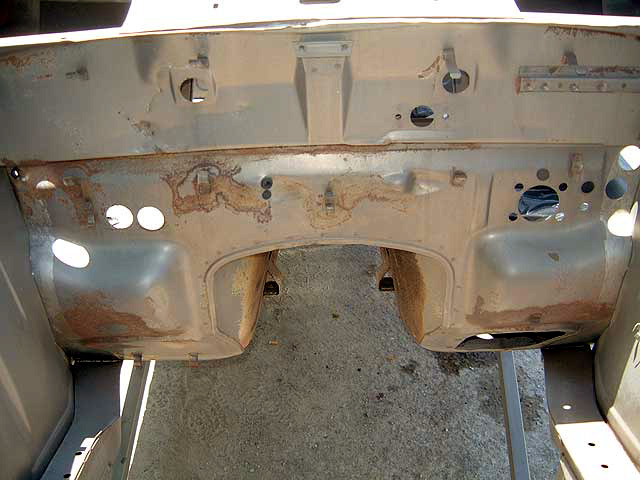 |
| This view shows the frame rails better. |
 |
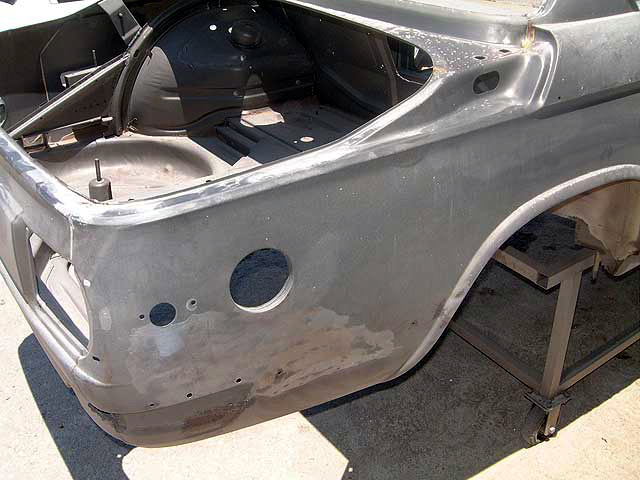
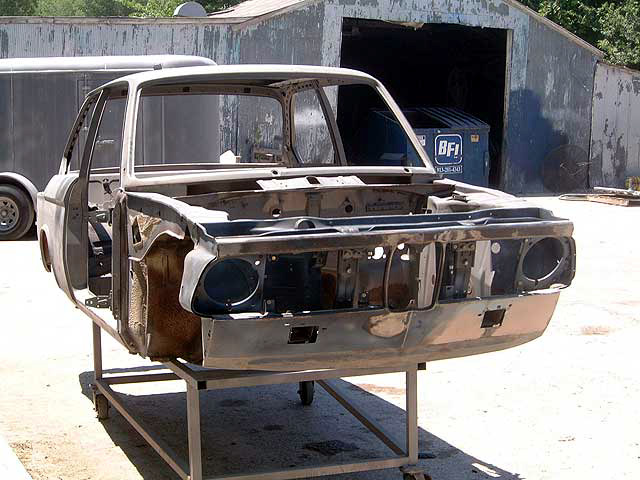
| FRONT CLIP: So far I'm disappointed. This appears to have been swapped from another donor car somewhere down the line. I'm going to have to get a new front clip to clear this up. It will also give me the narrow holes I need to mount the '72 bumper brackets and the '73 style bumper setup on the front without having to weld in patch panels. |
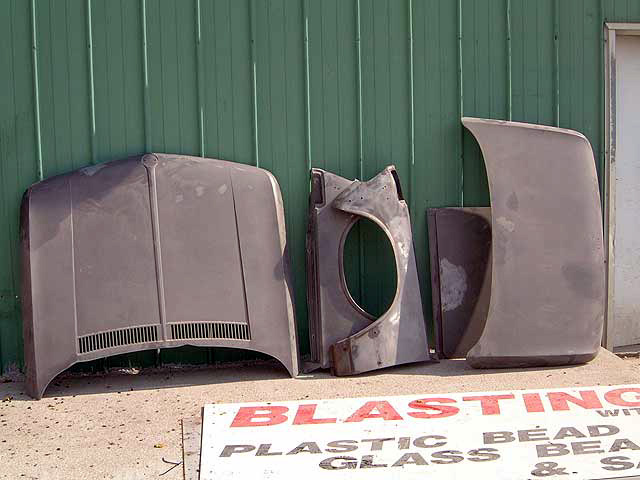 |
| The rest of the parts are fine and awaiting bead blasting of any minor rust. The suspension parts are being sprayed with POR-15 suspension paint. |
| OK, USING THE DRY ICE TRICK TO GET RID OF THE BLACK TAR INSULATION... |
|
|
| 1. Score the material with a box or utility knife in a checkerboard pattern. |
 |
| 2. Go to the grocery store and buy about 30-40 lbs of dry ice. Spread it over the floor pans so that all surfaces are covered. This is the tricky part, really. |
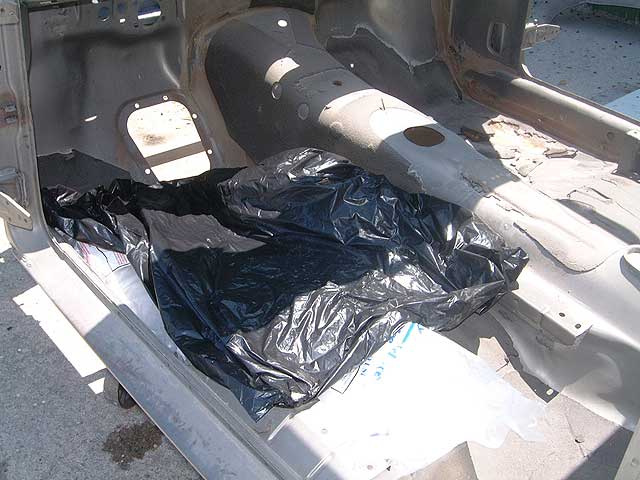 |
| 3. Cover it up with the trash bag to keep the coolness contained on the tar material. (It was 92 degrees this day in June!) Wait about 30 minutes. |
 |
| 4. Remove the ice and start pounding with the ball of the hammer. The stuff will fall off in chunks the size of your scoring patterns. Some areas may need some attention with the hammer and the scraper to get it out all the way. Some places I used a propane torch and a scraper. Be careful - this stuff will catch fire. |
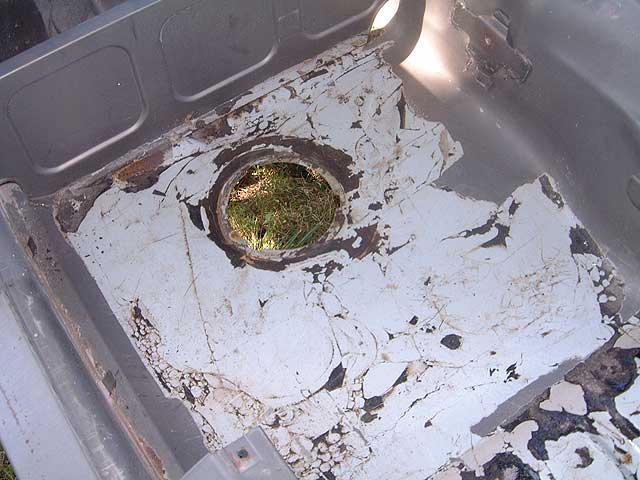 |
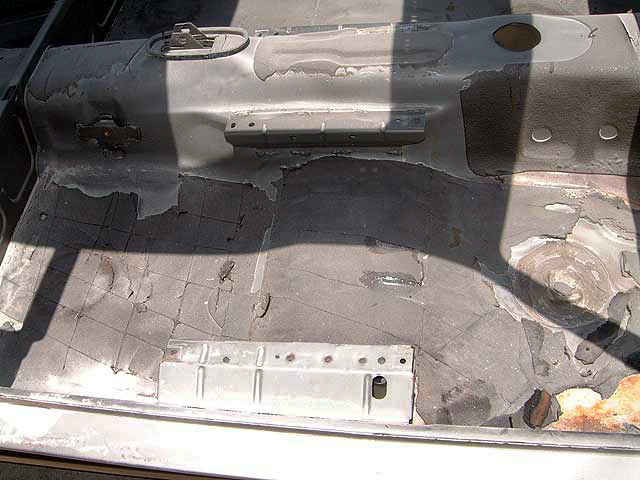
| Ok, here's the white primer/paint that was under the coating. This is the passenger side, rear floor pan. |
 |
| A view of the floor drain cover and the hole. You can see where they fit together. If these don't clean up I will cut some new ones from 16 gauge and weld them up. |
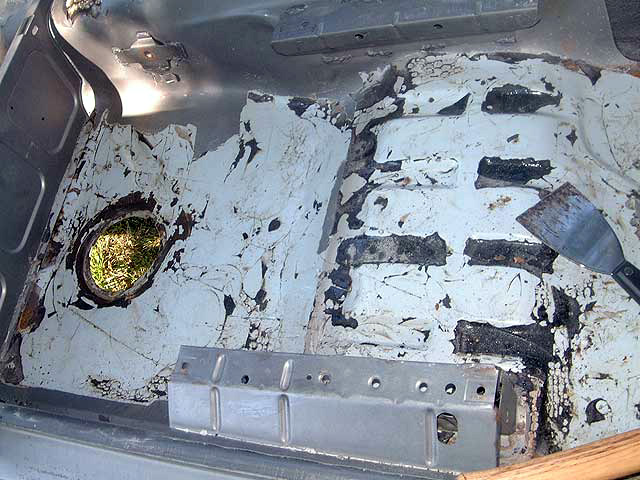 |
| Under the tar is more coating under the seat areas. This takes some elbow grease to get out. |
 |
| OK, I'm not done yet but it's getting there. You get the idea. |
 |
| So. Next up is the glass beading and the etching primer. In this state the car will begin to rust in about 36 hours if you don't put the primer on the bare steel. Luckily my stripper has the epoxy etching primer facilities to paint it. That will preserve the work and allow me to go after the prep work. |
|
